Windows Driver Setup Guide for A4 Printers
Getting your A4 printer working properly on Windows with FunPrint requires the correct driver installation and configuration. This guide walks you through each step to ensure smooth printing operations.
1. Obtaining the Right Driver
To ensure compatibility with your system, you need to download the appropriate driver version:
- Visit the official driver repository
- Look for the Windows driver package
- Download the file to your computer
- The driver file should be compressed in a .zip format
Driver Download Link:
https://cn.yintb.com/driver/window_driver.zipExtract the contents to a known location on your computer before proceeding with installation.
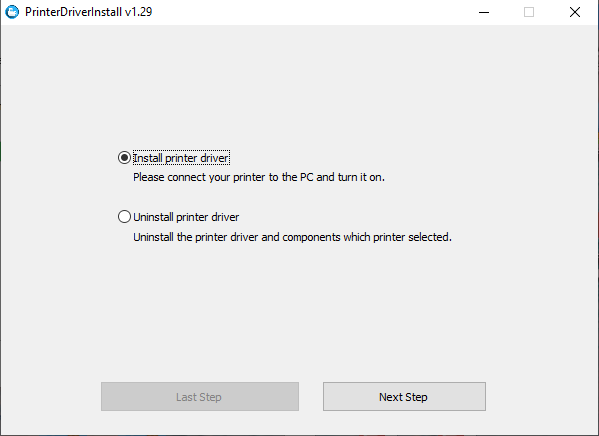
2. Driver Installation Process
Step 1: Launch the Driver Setup
- Navigate to your extracted driver folder
- Double-click the installer executable
- The printer driver setup wizard will open automatically
- Review the welcome screen and proceed by clicking “Next”
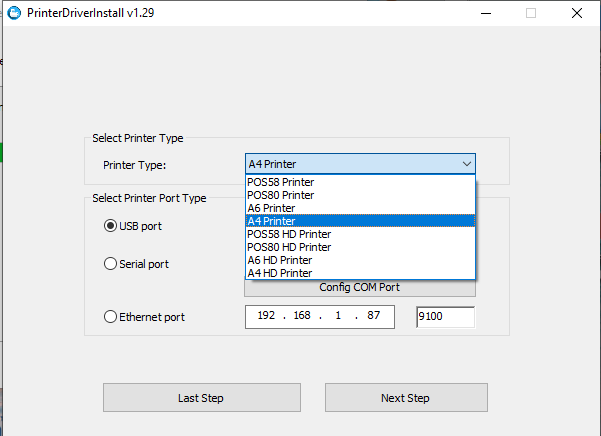
Step 2: Select Your Printer Model
- In the model selection screen, choose “A4 Printer” from the available options
- Verify you’ve selected the correct printer model
- Click “Next” to proceed to the installation phase
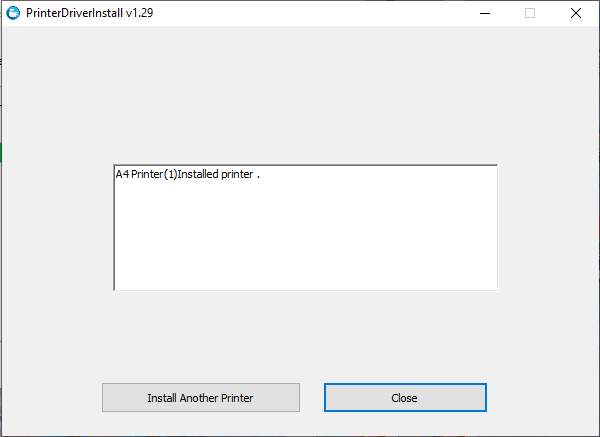
Step 3: Complete Installation
- The system will now copy files and configure your printer
- Wait for the installation progress bar to complete
- Once finished, click “Close” in the bottom-right corner of the wizard
- Your printer is now ready for use
3. Configuring Print Settings
Accessing Printer Preferences
- Open the “Devices and Printers” panel on your Windows computer
- Locate your installed printer in the device list
- Right-click on the printer icon
- Select “Printer Preferences” from the context menu
Paper Type Selection
The paper type setting is crucial for print quality:
- Navigate to the “Paper Type” tab or section
- Choose the appropriate material option based on what’s loaded in your printer:
- Continuous Paper: For standard roll paper
- Black Mark Paper: For black mark folding paper or marked roll paper
- Other options: Select based on your specific media
Different paper types require different printing approaches, so selection here directly affects output quality.
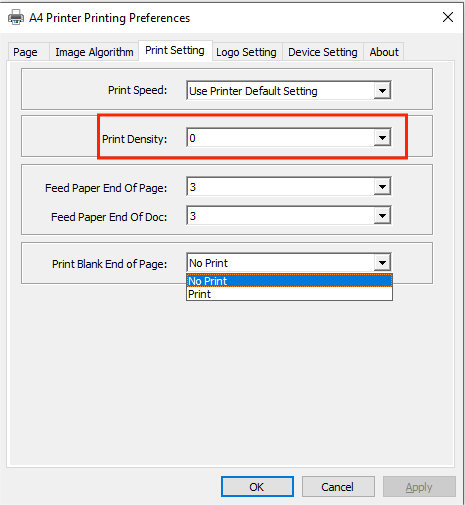
Print Density Adjustment
- Find the print density or intensity setting
- Adjust the level based on your desired output quality:
- Higher density produces darker, more saturated prints
- Lower density creates lighter impressions
- Start with default settings and adjust based on test prints
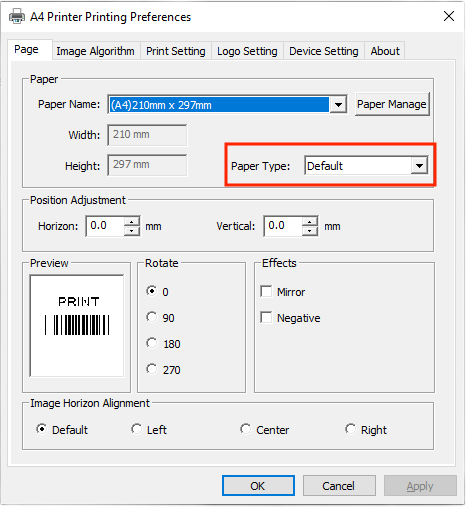
Image Processing Options
- Locate the “Image Algorithm” or “Dithering” settings
- Explore different dithering effects available:
- Different algorithms produce varying visual effects
- Each method has different characteristics for photo vs document printing
- Test different options to find what works best for your needs
- Apply your preferred setting and perform a test print
4. First Test Print
Now that everything is configured:
- Open a document or image you want to print
- From the “Print” dialog, select your newly installed printer
- Use the default settings we’ve configured
- Click “Print” and observe the results
- Adjust settings as needed based on the output

Tips for Best Results
- First Time Setup: Don’t adjust too many settings at once. Start with defaults and modify one at a time
- Test Prints: Always do test prints when changing paper types or major settings
- Driver Updates: Check periodically for driver updates from the official website
- Paper Quality: The quality of your output depends heavily on paper type selection
- Storage: Keep your driver installation file backed up for future reinstalls
Troubleshooting
Q: The printer doesn’t appear after driver installation A: Restart your computer after installation, then check Device Manager to verify the printer is recognized.
Q: Print quality is poor or very light A: Try increasing the print density setting in printer preferences. Also verify the correct paper type is selected.
Q: Driver installation fails A: Ensure you have administrator rights on your computer. Try extracting the driver file again and running the installer as administrator.
Q: Prints look blotchy or have uneven coverage A: Experiment with different image algorithm options. Also check that your paper is properly loaded and the correct paper type is selected.
For additional support or questions about other operating systems, visit our complete user guide.