Digital Document Printing
Transform your digital documents into professional physical prints with FunPrint. This guide walks you through the entire process of preparing, customizing, and printing your documents.
Overview
FunPrint offers a reliable solution for converting various digital document formats into high-quality printed materials. Whether you need printed copies for reading, archiving, sharing, or formal use, our printing system ensures accurate formatting and consistent output. This process streamlines your document workflow and improves efficiency in managing physical document requirements.
Step-by-Step Printing Process
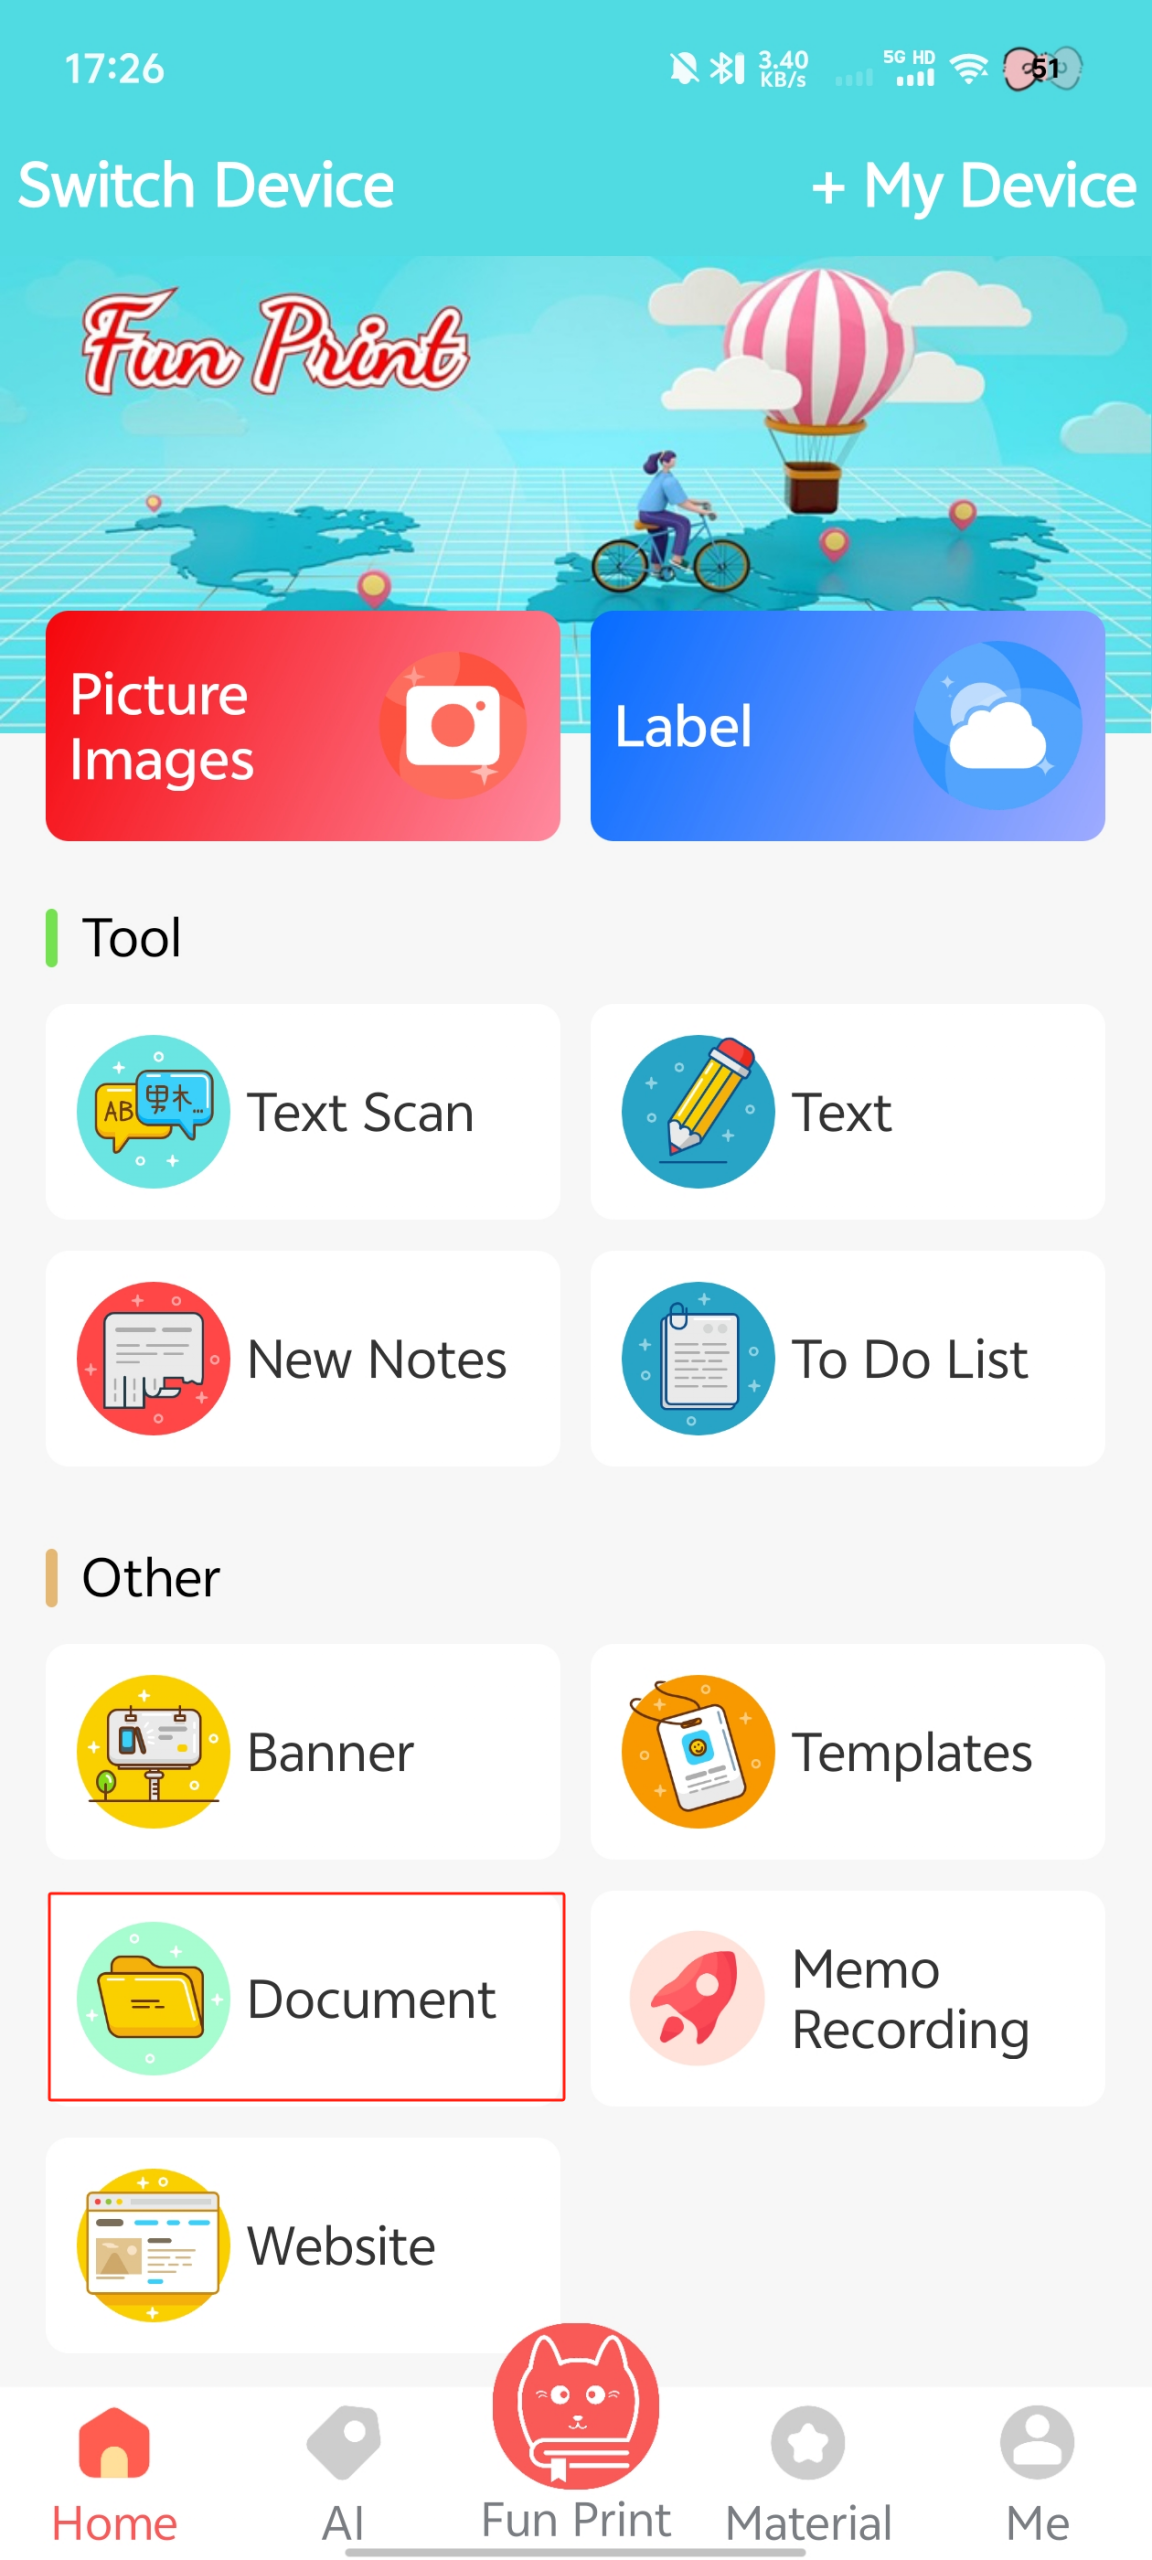
Step 1: Navigate to Document Section
Begin by opening FunPrint and selecting the “Document” option from the main menu. This section provides access to all document printing features and tools.
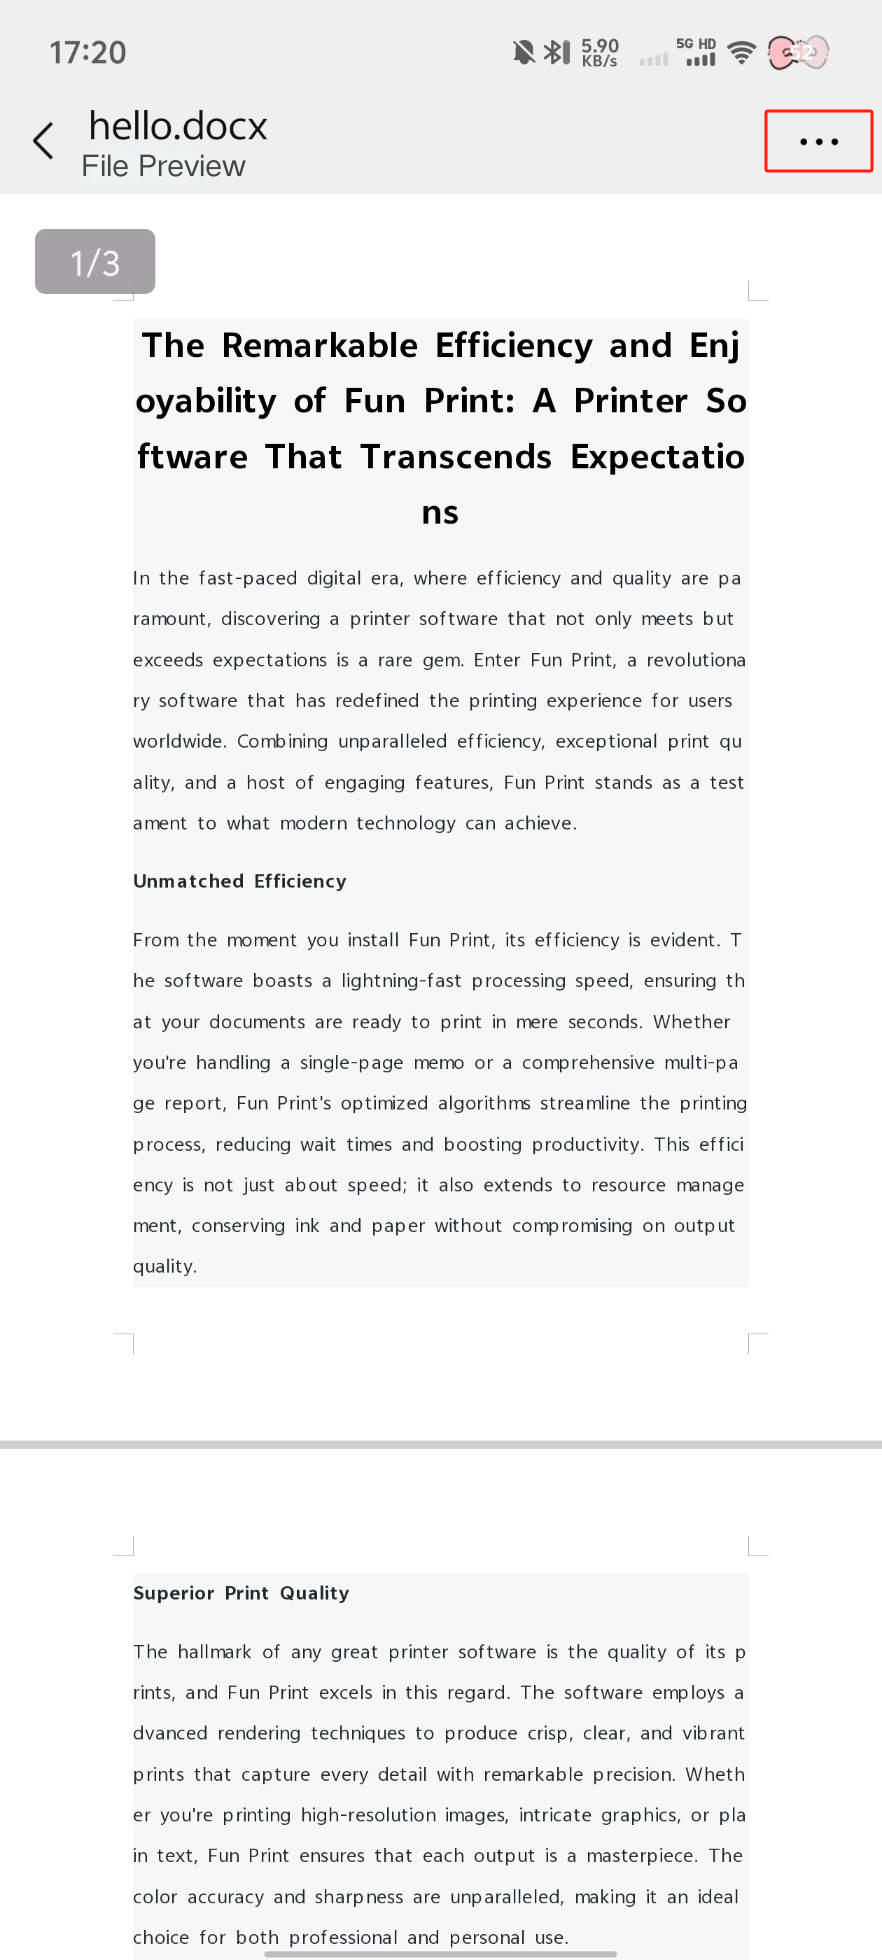
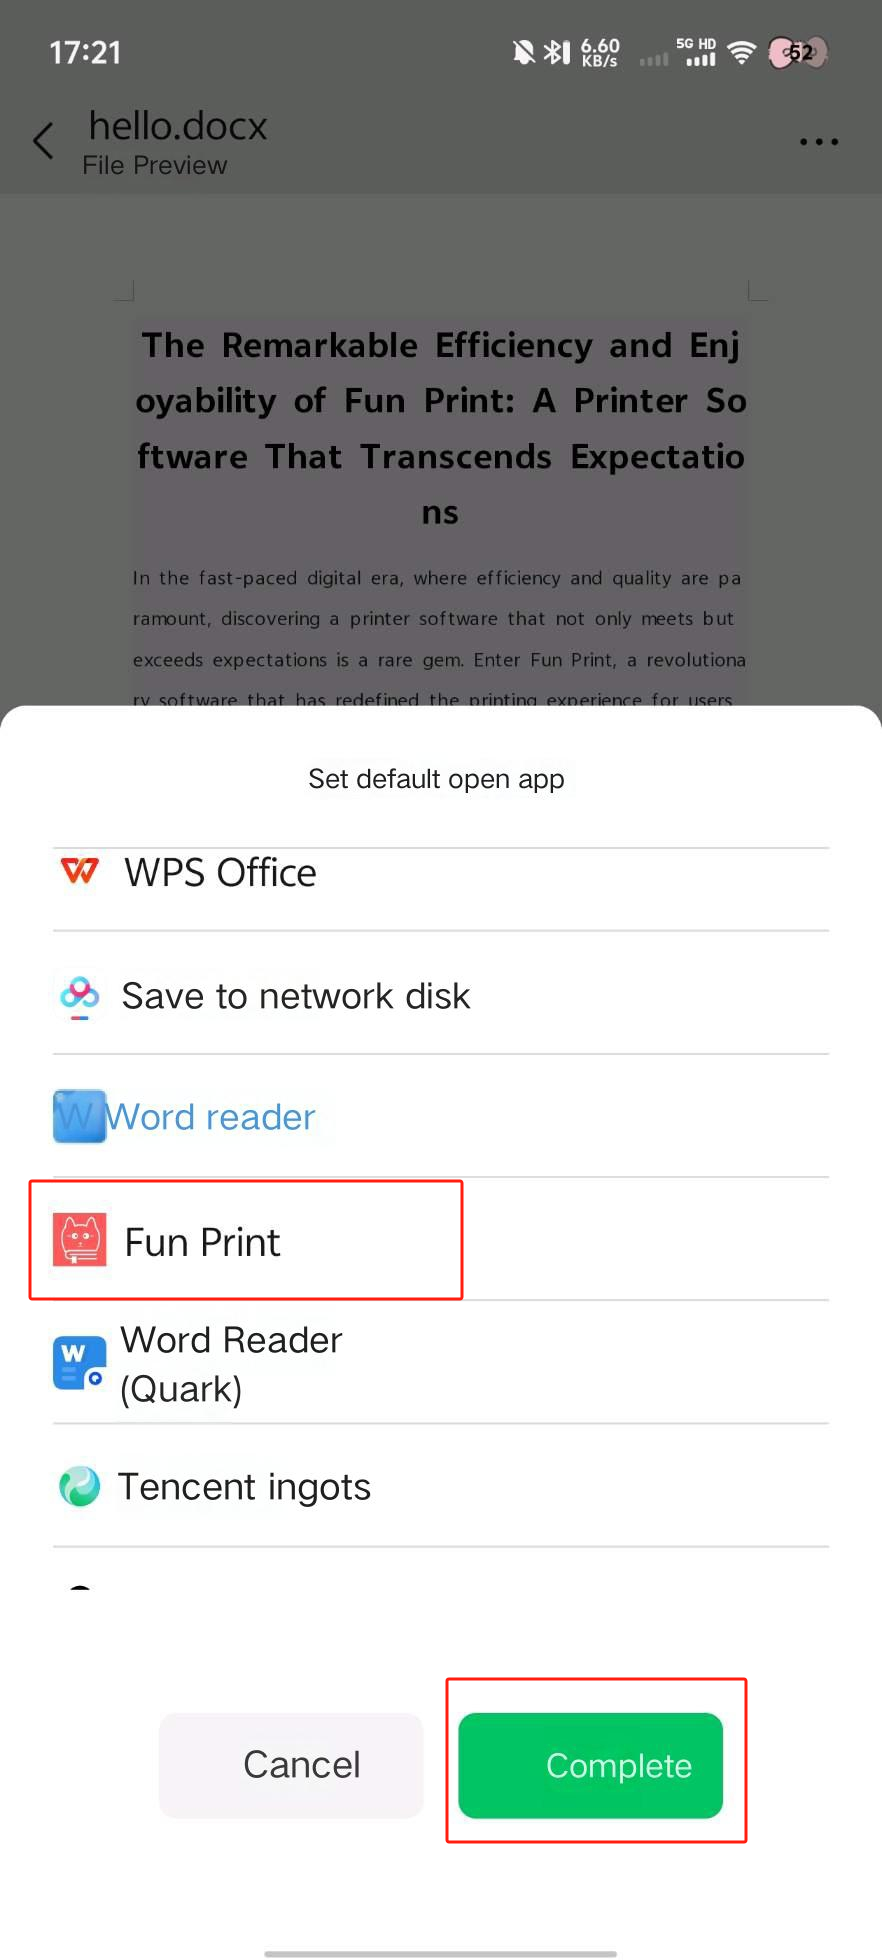
Step 2: Select Your Document
Locate the document file you wish to print. Use the file browser to find your document, then select either:
- “Open with” option - to open the document directly within FunPrint
- “Open in” option - to choose FunPrint from the list of available applications
Both options will import your document into the printing interface.
Step 3: Adjust Typography Settings
Once your document is loaded, you can customize the text appearance to suit your preferences. The font size adjustment controls are located on the right side of the interface:
- Use the [+] button to increase font size
- Use the [-] button to decrease font size
Adjusting the font size helps optimize readability and ensures the printed document matches your requirements.

Step 4: Initiate the Print Operation
When your document settings are finalized, locate and click the [Print] icon. This button is typically positioned at the top or bottom of the document interface and initiates the printing process.
Step 5: Final Configuration and Print Completion
The final step allows you to make any additional customizations before the document is sent to your printer:
- Review the print preview if available
- Make final adjustments to print settings
- Click [Print] to complete the process and begin printing
Your document will now be processed and sent to your connected printer for physical output.

Tips for Best Results
Document Preparation
- Ensure your document format is supported by FunPrint
- Check that all pages are properly formatted before printing
- Consider the document’s intended use when adjusting settings
Print Quality
- Adjust font size for optimal readability
- Use consistent formatting throughout your document
- Test with a single page first if unsure about settings
Troubleshooting
- If text appears cut off, try reducing the font size
- Ensure your printer has sufficient paper and ink
- Verify the printer connection is stable before printing
Advantages of Digital Document Printing
- Efficient Conversion: Streamlines the process of converting digital files to physical documents
- Professional Output: Maintains formatting and quality throughout the printing process
- Flexible Customization: Adjust typography and settings to match your preferences
- Multiple Use Cases: Perfect for personal, business, or archival purposes
- Improved Workflow: Centralizes document management and printing in one application
Supported Document Types
FunPrint supports printing from various digital formats and sources. Common supported types include:
- PDF documents
- Text files
- Rich text documents
- Popular office document formats
Check the FunPrint documentation for a complete list of compatible formats specific to your device.
Additional Considerations
Storage and Archiving
Once you’ve printed your documents, maintain organized filing systems for:
- Original digital files
- Printed physical copies
- Related documentation and records
Sharing Printed Documents
If you need to share physical documents:
- Print multiple copies in bulk for distribution
- Consider the distribution method and delivery timeline
- Ensure printed copies meet any required specifications
For additional questions or advanced printing topics, refer to our other tutorials or contact the support team.